Introduction
Have you ever eaten at a restaurant and thought, “Wow, this looks too good to eat”? That feeling doesn’t happen by accident.
Plating food is the art of arranging a meal on a plate so it looks as good as it tastes. Many home cooks think good plating needs fancy tools or years of training. That’s not true.
In this guide, you’ll learn simple food plating techniques that turn an ordinary meal into something special. Whether you’re cooking for family or prepping for a big dinner, these tips work for anyone. For more everyday nutrition and meal-prep guidance, you can also browse the Nutrition & Diet section on Hylavita.
What Is Food Plating and Why Does It Matter?
Food plating simply means arranging food on a plate before serving it. It’s the final step before a dish reaches the table.
You might wonder, does it really matter how food looks? The answer is yes. Sensory research on taste perception shows that people often judge food quality by sight before they even take a bite. A well-plated dish can make a simple pasta feel like a restaurant meal.
Moreover, plating shows care. It tells your guests, or your family, that the meal was made with attention. This is why learning how to plate food is a useful skill for beginners and professionals alike.
The Connection Between Looks and Taste
Our brains connect color, shape, and arrangement to flavor expectations. For example, bright, fresh colors often signal a fresh, healthy dish.
This isn’t just a kitchen myth. Professor Charles Spence, an experimental psychologist at the University of Oxford who studies how the senses interact, has spent years researching exactly this link between presentation and perceived flavor. His work on “gastrophysics” is a large part of why professional kitchens spend so much time on plating: it isn’t only about beauty, it measurably changes how a dish is experienced.
Essential Food Plating Techniques for Beginners
You don’t need culinary school to plate food well. A few basic techniques go a long way.
1. Choose the Right Plate
Start with a plate that fits your food. A large white plate makes small portions look elegant. A smaller plate works better for hearty, filling meals.
White or neutral-colored plates are a safe choice. They let the food’s natural colors stand out instead of competing with a busy pattern.
2. Think in Odd Numbers
When placing multiple items, such as shrimp or vegetable pieces, use odd numbers like three or five. Odd numbers look more natural and less rigid to the eye than even numbers.
This is a small trick, but it makes a real difference in how balanced a plate looks.
3. Use the Clock Method
Imagine your plate as a clock face. Place your protein, such as chicken or fish, around the 3 to 9 o’clock area. Put your starch, like rice or potatoes, near 9 o’clock, and your vegetables near 12 o’clock.
This simple layout, borrowed from classic culinary training, keeps portions balanced and easy to follow, even for beginners.
4. Create Height
Flat food can look boring. Stacking or layering ingredients adds visual interest.
For example, place a scoop of mashed potatoes first, then lean a piece of grilled chicken against it. This small change adds dimension without extra effort.
Advantages and Disadvantages of Focusing on Plating
Spending time on presentation has real upsides, but it isn’t free — it costs time, and a few habits can work against you if you’re not careful. Here’s a balanced look before you dive in.
Advantages
- Makes food taste better, subjectively. Research on visual presentation shows people rate the same dish as more flavorful when it’s arranged thoughtfully.
- Encourages portion control. Deliberate plating (like leaving negative space) naturally discourages overloading the plate.
- Elevates everyday meals cheaply. Techniques like the clock method or a sauce swirl cost nothing extra — no special tools required.
- Signals care. For guests or family, a plated meal communicates effort in a way that a hastily dished-out plate doesn’t.
- Builds a transferable skill. Once learned, these habits apply to almost any dish, cuisine, or occasion.
Disadvantages
- Adds prep time. Wiping edges, drizzling sauce carefully, and arranging components takes longer than simply dishing food out, which matters on busy weeknights.
- Food can cool faster. Extra time spent arranging a plate means hot food has longer to lose heat before it’s eaten.
- Risk of style over substance. Over-focusing on looks can lead to smaller portions or garnishes chosen for color rather than flavor or nutrition.
- Learning curve for consistency. Techniques like height-stacking or mold-layering can look messy at first and take a few tries to get right.
- Not always practical. Family-style meals, potlucks, or food meant to be eaten quickly don’t always benefit from elaborate plating.
The takeaway: use these techniques when the occasion calls for it, and don’t feel obligated to plate every weekday dinner like a tasting menu.
Food Presentation Ideas You Can Try at Home
Once you know the basics, it’s time to get creative. Here are some food presentation ideas that don’t require special equipment.
Use Sauce as Art
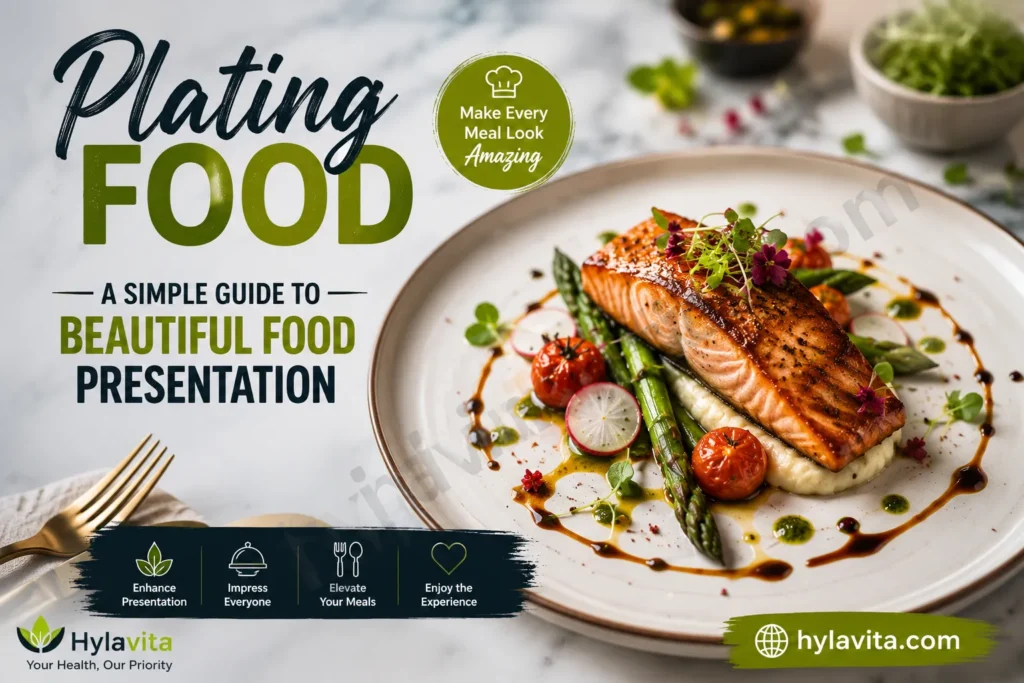
Instead of pouring sauce over the whole dish, try drizzling it in a swirl or a few dots. A spoon or squeeze bottle gives you more control.
This method is common in professional kitchens because it keeps the main food visible while adding color and flavor.
Add a Pop of Color
A plate of mostly brown or beige food, like meat and potatoes, needs a splash of color. A few cherry tomatoes, a sprig of parsley, or a handful of greens can brighten the whole plate.
However, don’t add color just for looks. Choose garnishes that also add flavor or texture.
Leave Empty Space
New cooks often try to fill every inch of the plate. In fact, empty space, sometimes called “negative space,” makes food look more refined.
Think of it like a picture frame. Too much clutter takes attention away from the main subject, which is your food.
Wipe the Plate Edges
This is a small step that many people skip. Before serving, wipe away any smudges or spills on the plate’s rim with a clean cloth or paper towel.
It takes ten seconds, but it makes the whole dish look neater and more intentional.
How to Plate Food Step by Step
If you’re not sure where to start, follow this simple process.
Step 1: Warm or Chill Your Plate Serve hot food on a warmed plate and cold food on a chilled one. This keeps the temperature right and shows attention to detail.
Step 2: Place the Main Item First Start with your protein or main ingredient. This becomes the anchor for everything else on the plate.
Step 3: Add Your Sides Place your starch and vegetables around the main item using the clock method mentioned earlier. Keep portions balanced so no single item overwhelms the plate.
Step 4: Add Sauce or Garnish Last Sauces and garnishes go on last so they stay fresh and don’t get pushed around while you arrange other food.
Step 5: Step Back and Check Before serving, look at the plate from above. Ask yourself if it looks balanced, colorful, and clean. Adjust anything that looks off.
Creative Food Plating Ideas for Special Occasions
For birthdays, holidays, or dinner parties, you may want to go beyond the basics. Creative food plating can turn a simple meal into a memorable one.
Try a Theme
Match your plating to the occasion. For example, use fresh herbs and light colors for a spring brunch, or deep reds and golds for a holiday dinner.
Use Edible Flowers or Microgreens
Small edible flowers or microgreens add color and a professional touch. They’re available at many grocery stores or farmers markets, though availability can vary by season and location.
Play with Textures
Combine soft, crunchy, and smooth elements on one plate. For instance, pair creamy mashed potatoes with crispy fried onions. This adds interest to both the look and the bite.
Layer with Rings or Molds
A simple round mold can help you stack rice, vegetables, or salad into a neat cylinder shape. This technique is common in restaurants and easy to try at home with a clean tin can or a kitchen ring mold.
Common Mistakes to Avoid When Plating Food
Even with good techniques, small mistakes can hurt your presentation.
- Overcrowding the plate: Too much food on one plate looks messy, not generous.
- Ignoring color balance: A plate with only one color, like all brown or all white, looks flat.
- Messy sauce drips: Sloppy sauce application can undo an otherwise clean plate.
- Using the wrong plate size: A plate that’s too big or too small throws off the whole look.
- Forgetting the garnish should be edible: Garnishes should add to the meal, not just sit there for decoration.
In short, good plating is about balance, not perfection.
FAQ: Plating Food
What is the easiest way to start plating food better? Start with a clean, neutral-colored plate and use the clock method to place your main dish, starch, and vegetables. This alone will improve most home-cooked meals without any extra tools.
Do I need special tools for food plating? No, basic tools like a spoon, a squeeze bottle, and a clean cloth are enough for most home cooking. Professional tools like plating rings or tweezers are helpful but not required for beginners.
How much food should I put on a plate? Portion size depends on the meal, but leaving some empty space usually looks better than an overfilled plate. A good rule is to fill about two-thirds of the plate, leaving the rest as visual breathing room.
Can food plating techniques work for everyday meals, not just special occasions? Yes, simple techniques like the clock method, adding a pop of color, and wiping plate edges take very little extra time. They can turn even a weekday dinner into something that feels a bit more special.
What are some quick food presentation ideas for beginners? Try drizzling sauce instead of pouring it, adding a few fresh herbs on top, and choosing a plate size that fits your portion. These small changes make a big visual difference with almost no extra effort.
Conclusion
Plating food doesn’t have to be complicated or reserved for professional chefs. With a few simple techniques, like the clock method, using odd numbers, and adding color, anyone can make a meal look more appealing. As the advantages and disadvantages above show, it’s worth matching the effort to the occasion rather than plating every meal like a tasting menu.
The key is practice. Try one new technique each time you cook, and you’ll notice your plates looking better within just a few tries.
Next time you cook a meal, take an extra minute to arrange it thoughtfully. You might be surprised how much better it looks, and how much more you enjoy eating it.
For more practical, plain-language food and nutrition guides, visit Hylavita.e you cook a meal, take an extra minute to arrange it thoughtfully. You might be surprised how much better it looks, and how much more you enjoy eating it.
Disclaimer
This article is for general informational and educational purposes only. It reflects common culinary practices and publicly available sensory-science research