
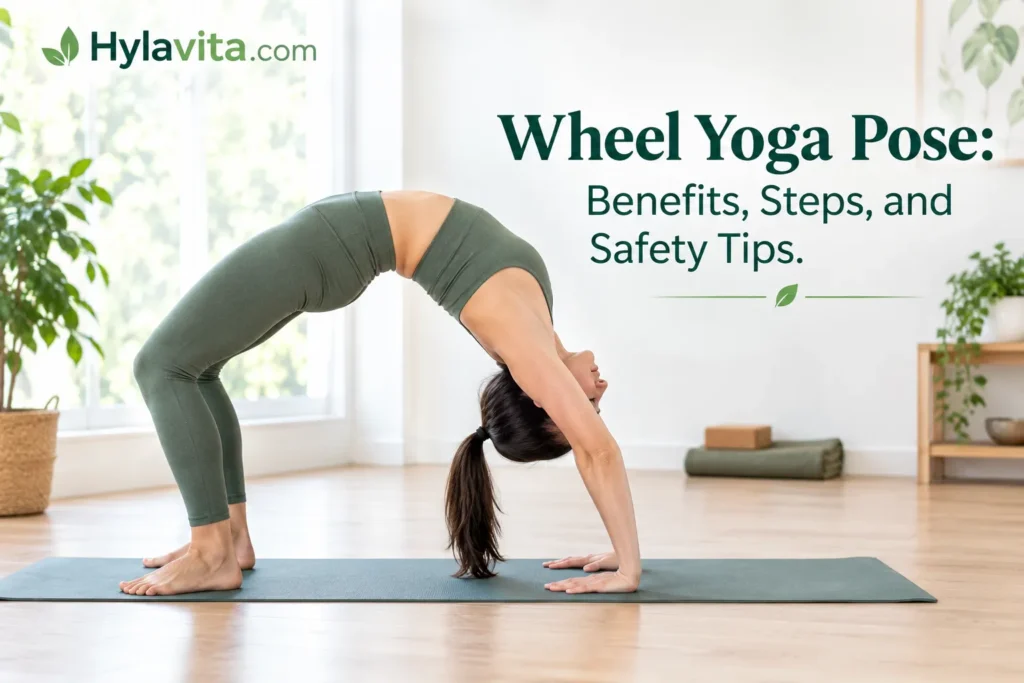
The wheel yoga pose is a deep backbend that builds strength and improves flexibility. Many people know it as Upward-Facing Bow Pose or Urdhva Dhanurasana. This pose stretches your chest, shoulders, abdomen, and hip flexors. It also works your arms, legs, and core muscles. However, it requires good mobility, strength, and careful technique. Beginners should learn the basics before attempting this challenging pose. Proper warm-ups can help prepare your body for the movement. In this guide, you will learn its benefits, steps, and safety tips. You will also discover common mistakes and easier modifications.
What Is the Wheel Yoga Pose?
The wheel yoga pose is a backbend that lifts your chest and hips. It requires strength, balance, and flexibility throughout your body. This pose stretches the front body while engaging several muscle groups. You should warm up properly before attempting this challenging position.
What Is Wheel Pose Also Called?
The wheel yoga pose is also called Urdhva Dhanurasana in Sanskrit. Its English name is Upward-Facing Bow Pose. Some people simply call it Wheel Pose. These names describe the same yoga posture, which involves lifting your body into a deep backbend.
Which Yoga Pose Is Known as Wheel Pose?
Wheel Pose is a yoga posture performed while lying on your back. You bend your knees and place your feet flat on the floor. Then, position your hands beside your ears with your fingers pointing toward your shoulders. Press through your hands and feet to lift your body. Your chest rises, and your back forms an arch. Your arms and legs support your weight during this movement. Wheel Pose differs from Bridge Pose because it requires your hands to support your body. Proper technique helps you practice this challenging posture more safely.
Benefits of the Wheel Yoga Pose
The wheel yoga pose offers several benefits when practiced with proper technique. It combines a deep backbend with active muscle engagement. Regular practice may help improve mobility, strength, and body awareness. However, results depend on your flexibility, experience, and practice habits.
Improves Spinal and Shoulder Flexibility
The wheel yoga pose moves your spine into a deep backbend. It also challenges the flexibility of your shoulders and upper back. Regular, gentle practice may help improve your range of motion. However, you should never force your body into the position. Move slowly and stop if you feel sharp pain. Good technique helps you avoid placing excessive pressure on your lower back.
Strengthens the Arms, Legs, and Core
Wheel Pose requires your arms and legs to support your body. Your shoulders and triceps help push your upper body upward. Your legs and glutes help lift and stabilize your hips. Your abdominal and back muscles also work to control the position. This combination makes Wheel Pose a demanding full-body exercise. Build strength gradually before attempting the complete pose.
Opens the Chest and Stretches the Front Body
The wheel yoga pose stretches several muscles along your body’s front. These include your chest, abdomen, and hip flexors. The backbend also challenges shoulder mobility and upper-body extension. This movement may help counter stiffness from spending long periods sitting. However, it cannot guarantee better posture or eliminate back pain. Practice within your comfortable range and maintain steady breathing throughout the pose.
How to Do the Wheel Yoga Pose Step by Step
Follow these steps to practice the wheel yoga pose with proper technique. Warm up your wrists, shoulders, hips, and back before starting. Use a nonslip yoga mat and move slowly throughout the exercise.
Step 1: Lie on Your Back and Position Your Hands
Lie on your back with your knees bent and feet flat. Bend your elbows and bring your hands beside your ears. Keep your palms flat on the mat. Point your fingers toward your shoulders. Spread your fingers comfortably and keep your wrists aligned with your forearms.
Step 2: Bend Your Knees and Place Your Feet
Place your feet hip-width apart and keep them flat on the mat. Bring your heels reasonably close to your hips without forcing them. Keep your knees pointing forward rather than spreading outward. Check that both feet feel stable and balanced. This starting position prepares your body for the upward movement.
Step 3: Lift Your Hips and Chest
Press firmly through your feet and hands as you begin lifting. Raise your hips first, then gently lift your chest. Keep breathing normally and avoid rushing into the backbend. If needed, pause with your head lightly supported before pushing higher. Never place your full body weight on your head or neck.
Step 4: Straighten Your Arms Comfortably
Press through your palms and gradually straighten your arms. Lift your chest while keeping your feet firmly planted. Avoid locking your elbows or forcing your shoulders beyond their comfortable range. Keep your knees tracking over your feet. Only lift as high as you can maintain with steady control.
Step 5: Hold and Release the Pose Safely
Hold the wheel yoga pose for a few comfortable breaths. Beginners should start with a short hold and avoid straining. To exit, tuck your chin gently and bend your elbows. Slowly lower your shoulders, back, and hips onto the mat. Rest before repeating the pose.
Muscles Worked in the Wheel Yoga Pose
The wheel yoga pose engages several muscles to support your body during the backbend. Some muscles create movement, while others help maintain balance and control. Understanding these muscles can help you practice with better form.
Primary Muscles Used During Wheel Pose
Wheel Pose works your glutes, spinal erectors, shoulders, and triceps. Your glutes help lift and support your hips. Your back muscles help extend your spine during the backbend. Your shoulders and triceps help push your upper body upward. These muscles work together to support the pose.
Supporting Muscles That Help Stabilize Your Body
Your abdominal muscles help control your trunk during Wheel Pose. Your quadriceps help straighten and stabilize your legs. Your hamstrings assist with hip extension and help control leg position. Muscles around your shoulder blades also support stable shoulder movement. Working together, these muscles help maintain control throughout the pose.
Common Wheel Yoga Pose Mistakes
The wheel yoga pose requires control, strength, and careful body positioning. Small mistakes can make the pose uncomfortable or increase injury risk. Learning what to avoid helps you practice more safely.
Placing the Hands and Feet Incorrectly
Placing your hands or feet too far apart can affect your balance. Keep your feet about hip-width apart and your palms firmly grounded. Point your fingers toward your shoulders before lifting. Avoid letting your knees spread widely outward. Proper positioning helps you maintain better control during the backbend.
Forcing the Backbend or Flaring the Ribs
Pushing too deeply into Wheel Pose can strain your back and shoulders. Avoid forcing your spine into a deeper arch than comfortable. Keep your ribs controlled instead of letting them flare excessively. Build flexibility gradually through gentle stretches and preparatory poses. Stop immediately if you feel sharp pain or pinching.
Holding Your Breath or Moving Too Quickly
Holding your breath can make the pose feel more difficult. Breathe steadily while lifting, holding, and releasing your body. Avoid rushing into the backbend or dropping suddenly onto the mat. Move slowly and maintain control throughout each step. If you feel dizzy, uncomfortable, or strained, exit the pose carefully and rest.
Safety Tips and Who Should Avoid Wheel Pose
The wheel yoga pose requires strength, flexibility, and careful body control. Practicing it incorrectly may strain your wrists, shoulders, or back. Follow these safety tips to reduce unnecessary risks.
Important Safety Precautions
Warm up your wrists, shoulders, hips, and back before practicing. Start with gentle stretches and easier backbends, such as Bridge Pose. Use a stable, nonslip yoga mat for better support. Move slowly and breathe normally throughout the pose. Never force your body into a deeper backbend. Stop immediately if you feel sharp pain, dizziness, or unusual discomfort. Beginners may benefit from guidance from a qualified yoga instructor.
When to Avoid the Pose or Seek Professional Advice
Avoid Wheel Pose if you have an acute injury affecting your wrists, shoulders, neck, or back. People recovering from surgery should seek medical clearance before attempting it. Pregnancy may also require avoiding deep backbends, depending on individual circumstances. Ask a healthcare professional if you have osteoporosis, balance problems, or a medical condition affecting movement. If the pose causes pain or numbness, stop practicing. A qualified instructor or healthcare professional can help you choose safer alternatives based on your needs.
Wheel Yoga Pose Modifications for Beginners
Beginners can build strength and flexibility before attempting the full wheel yoga pose. Simple modifications help you learn the movement with better control. Always work within your comfortable range and avoid forcing your back.
Practice Bridge Pose First
Bridge Pose is a helpful starting point for learning backbends. Lie on your back with bent knees and feet flat. Press through your feet to lift your hips gently. Keep your shoulders relaxed and breathe normally. This pose helps strengthen your glutes and back muscles. Practice it comfortably before progressing to Wheel Pose.
Use Props and Gentle Preparatory Stretches
Gentle stretches can prepare your shoulders, wrists, and hips for Wheel Pose. Try comfortable shoulder movements and wrist circles before practicing. A yoga instructor may suggest suitable props for your needs. Keep blocks stable and avoid placing them where they might slip. Props can support your practice, but they cannot replace proper technique. Stop if you feel pain or excessive strain.
How Long Should You Hold Wheel Pose?
Beginners should hold the wheel yoga pose for just a few comfortable breaths. Start with a short hold and focus on proper form. As your strength and flexibility improve, you may gradually increase the duration. Experienced practitioners may hold the pose longer if they remain comfortable. There is no single holding time that suits everyone. Keep breathing normally and avoid pushing through pain. If your form starts to weaken, lower yourself slowly and rest before trying again.
Frequently Asked Questions About Wheel Yoga Pose
What Are the Benefits of Doing the Wheel Pose in Yoga?
Wheel Pose stretches the chest, abdomen, shoulders, and hip flexors. It also strengthens the arms, legs, glutes, and back muscles. Regular practice may improve flexibility, strength, and body awareness.
How to Do Yoga Poses Step by Step?
Start by choosing a pose that matches your experience level. Read the instructions and warm up your body first. Move slowly, breathe naturally, and maintain proper alignment. Stop if you feel pain or discomfort.
What Are the 5 Main Benefits of Yoga?
Yoga may improve flexibility, balance, strength, and body awareness. It can also help reduce stress and support relaxation. Results vary depending on the style, frequency, and individual practice.
How to Do a Wheel Pose Properly?
Lie on your back with your knees bent and feet flat. Place your palms beside your ears, fingers pointing toward your shoulders. Press through your hands and feet to lift your hips and chest. Straighten your arms only as comfortably possible. Keep breathing steadily and avoid placing weight on your head or neck. Lower yourself slowly when finished. Beginners should practice Bridge Pose first and seek guidance from a qualified instructor when needed.
Conclusion
The wheel yoga pose can help improve flexibility, strength, and body awareness. However, it requires proper technique and careful preparation. Start with gentle stretches and practice Bridge Pose before attempting a full backbend. Move slowly, breathe normally, and never force your body. With regular, safe practice, you can gradually build the skills needed for Wheel Pose.
Hylavita’s suggestion to read
- Psoas Release: Benefits, Techniques, and Safety Tips
- Is Plow Pose Good for You? Benefits, Risks, and Proper Form
- 5 Daily Posture Exercises to Fix Forward Head and Slouching
Disclaimer: This article is for informational purposes only and does not replace professional medical advice. The wheel yoga pose may not suit everyone, especially people with injuries or certain health conditions. Consult a healthcare professional before trying this pose if you have health concerns. Stop immediately if you experience pain, dizziness, or discomfort.